Unordered List

Play PES 2015 Online with your friends

Play PES2015 online and challenge your friends on PS4

Start your blog easily in few clicks

Create a professional blog without any experience and start making money

Get paid iPhone apps for free, Legally!

App trackers allow you to legally track changes in price for many, if not most, apps available on the iTunes App Store

Install Kali Linux in dual boot with Windows

Learn how to have Kali Linux installed in dual boot with your Windows and take profit of the distibution functionalities

Youtube: FIVE Tips and tricks for the fatest use

If you think you know everything about YouTube, Check out these Fast Five tricks...

Showing posts with label iOs. Show all posts

How To Hack iPhone's Lock Screen to Access Photos, Contacts...


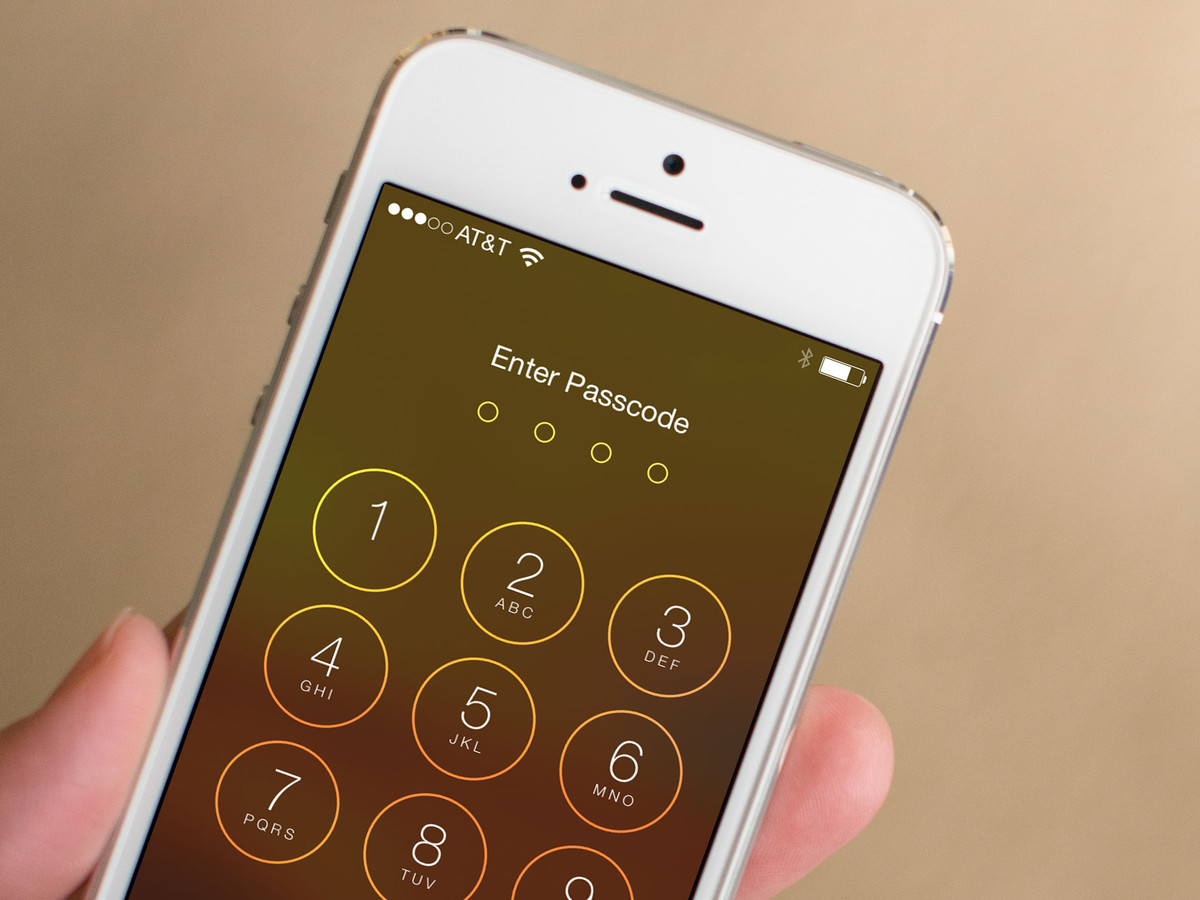
 A new iPhone exploit has recently been discovered by YouTube user videosdebarraquito, who has found many other exploits and bugs in iOS over the years. This new exploit allows someone to bypass the lock screen and gain access to contacts and photos via Siri, Apple's digital voice assistant,but it only affects the iPhone 6s and the iPhone 6s Plus because it requires 3D Touch functionality.

 How To Hack iPhone's Lock Screen to Access Photos, Contacts...


 How to Access the Bug


 - The first step in the flaw begins with asking Siri to search Twitter for an email address.
 - Once the results pop up on screen, the next step is to find one with a valid email address and use "force touch" to bring up the menu.
 - Once you select the "Add Existing Contact" option, you now obtain access to all of the contacts stored on the phone, without a passcode or Touch ID !

 Another part of this flaw occurs when you select the "Create a New Contact" option in the same menu after using the 3D Touch feature. Once chosen, you can then add a new picture to the contact, thereby obtaining access to all of the photos on the device.

 See also: How to Enable Multitasking in iOS 9

 How to Fix It


 Thankfully, there's a two-step process that you have available to fix this latest issue.
 1/ Go into your Settings, then select the Privacy tab and choose Photos. Then disable Siri's access from there if it's present. This keeps would-be intruders out of your pictures.

 2/ Go back into Settings, then select Touch ID & Passcode. After you've entered your passcode, scroll down and switch off the option that gives Siri access.

 Source: EverythingApplePro YouTube Channel

How to recover deleted photos in iOS


 When you delete a photo in iOS 8, it's not actually gone, at least for a short time. Any image you delete sits in a special folder called "Recently Deleted," where you can retrieve it within 30 days. If you've deleted a photo by mistake, don't panic, take a look through our extremely simple walkthrough to learn how you can save your precious pic.


How to recover deleted photos in iOS

How to save a deleted image

 Head to your iPhone's Camera Roll and click on the Albums icon at the bottom-right of the screen. Next, click the Albums option at the top-left of your display. 

How to recover deleted photos in iOS


Clicking this will bring you to your main "Albums" menu display, showing your Camera Roll, videos, any favorites you've added and, crucially, your Recently Deleted folder. 

How to recover deleted photos in iOS


 If you go into your Recently Deleted folder, you'll see all of your deleted images from up to 30 days ago. To restore an image back to your Camera Roll, click the specific image and tap "Recover" at the bottom-right of your screen. 

How to recover deleted photos in iOS


 You can also recover multiple images from the "Recently Deleted" folder view by clicking "Select" at the top-right of your screen, tapping each image you want to save (a blue tick will appear on each one) and then choosing "Recover" at the bottom-right. 

How to recover deleted photos in iOS

How to permanently delete images

 It's worth noting that you can also permanently delete images from the "Recently Deleted" folder. Simply select the image you want to delete and choose the delete option. There's no recovering these files, though, so be careful.

How to recover deleted photos in iOS


Have something to add ? Share it in the comments.

How to Track Kids / Friends iPhone Without Them Knowing


 You still holding onto your kids being young enough to know where they are at all times? Need to know how to track a friends or your partner's phone and know exactly where they go after work? In this new post, i'll show you how you can monitor every movement of the person you're spying on. Not only that, but you can even set reminders for when they leave school or arrive a certain location!


 How to Track Kids / Friends iPhone Without Them Knowing


 First of all, you'll need to have access on their iPhone, then share their location to your iPhone without them knowing using a very simple application called Find My Friends (On iOS 9, Find My Friends is a stock app that will already be on the device).

 Step 1: Enable "Share My Location" on Their iPhone

 Open the Find My Friends app on their iPhone, then tap on their contact picture at the bottom to enable "Share My Location" from the settings.
 Also make sure that the location is being shared from "This Device" (under the "Share My Location From:" setting), as there may be other devices (like an iPad) that are attached to the same iCloud account.


 Step 2: Share Their Location to Your iPhone

 On your iPhone, swipe up from the bottom of the screen to enable AirDrop from the Control Center. Make yourself discoverable to "Everyone", although the "Contacts Only" option will suffice as long as their iPhone has your contact information saved to it.
 Back on their iPhone, tap on "Add" (in Find My Friends) and hit your contact icon when it appears. Select "Share Indefinitely" to share their location to your iPhone for an unlimited amount of time.


 Step 3: Accept Their Location; Don't Share Yours Back

 Once their location is shared to your device, hit "Accept." After a few seconds, a popup will appear asking if you want to share your location with them. Tap on "Don't Share" so that they can't track your location.


 Step 4: Track Their Location

 In the Find My Friends app, simply click on their contact icon to see their exact location in realtime. You'll also see options to be notified if they leave or arrive at a certain location, so you can alert yourself when someone leaves their house or work.


 Step 5: Hide Their 'Find My Friends' App so that they don't even realize they have it

 Make sure the first page of your home screen is full and that the Find My Friends app is on the second page. Press and hold on any icon to enter edit mode, then drag the Find My Friends app onto any app on the first page to create a folder. When in the folder, remove the Find My Friends app and drop onto the dock and watch it disappear.

 Share the post if you like it, comment if you have questions :)
 Source: WonderHowTo

How to Sync / transfer Music to Apple Watch


 The Apple Watch is able to host 2GB of music into its memory. Practice for long sports sessions. The Apple Watch can take control of music of the iPhone but it can also stocks its own tracks. Allows you to go jogging without iPhone while enjoying a personalized playlist on your wrist. To transfer the desired files into Apple Watch, follow the post.


How to Sync transfer Music itunes Apple Watch

 The Apple Watch hosts music by synchronization with one of the lists available on the iPhone. That is why, for simplicity, it is advisable to first create a specific list that named "Apple Watch Music".
 You can create playlists using Music Application on iPhone and iTunes Application on Mac. For more comfort, opt for iTunes.
 1- Open iTunes on Mac and create a list entitled "Apple Watch Music" by clicking on the '' + '' at the bottom of the library lists.

How to Sync transfer Music itunes Apple Watch

 2- Drag and drop tracks into "Apple Watch Music" list. Attention, the synchronized list with Apple Watch can not exceed 2GB which represents 250 tracks.

 3- Sync iPhone and iTunes (make sure to check "Apple Watch Music" list in the synchronization interface (Music tab)

 4- Once the "Apple Watch Music" list synchronized with the smartphone, open Apple Watch iPhone app and hit My watch

How to Sync transfer Music itunes Apple Watch


 5- Go to Music> Playlist Limit :

How to Sync transfer Music itunes Apple Watch

 6- Define the limit size of the list hosted by the watch: 100 MB (15 tracks), 500 MB (50 tracks), 1GB (125 tracks) or 2GB (250 tracks).

 7- Back to previous page (Music) by tapping:
How to Sync transfer Music itunes Apple Watch
 8- Go to Synced Playlist :

How to Sync transfer Music itunes Apple Watch


 9- Select the Playlist to move. For our example here, its name is ''Apple Watch Music''.
 10- Place your Apple Watch on the charger. Synchronization begins automatically. It may take several minutes!

How to Sync transfer Music itunes Apple Watch

 To verify that all the desired music has been transferred, open Settings on Apple Watch, go to General> Information and look at the number of tracks copied in Music.
 Read on our Blog:  How to connect Android Wear with an iPhone / iPad
 The files are now accessible via the Music application of your Apple Watch. If the songs listed in the "Apple Watch Music" list are also part of other lists (Purchased, car, sports...) of the iPhone, they will appear in the watch interface.

 Good luck and don't miss to leave us a comment below :)

How to Stream your Smartphone Screen (Android / iOs) on Your PC / MAC


 You want to display the content of your iPhone / iPad or even your Android screen (streaming or mirroring) on your computer? Here is a short simple tutorial to help you then you can play your favorite games or navigate through your computer's big screen!

 
How to Stream screen mirror Smartphone Android iOs iphone ipad PC MAC

 Prerequisite:
 We must first download and install Reflector 2 software on your PC / Mac and your mobile device.

 The Reflector 2 is available for PC, Mac, Android and iDevice from the official site: http://www.airsquirrels.com/reflector/download/

 Read also: How to use your tablet as a computer screen monitor

 Show screen contents on your computer (Mac or PC) :

 After installing the software on your computer and the application on your mobile device, just follow these steps:

 - Launch Reflector 2 on your computer
 - Select the "Try Reflector 2" option,
 - Go down & right and make a right click on the Reflector 2 icon
 - Once a small window appears, go to "Settings"
 - Choose "Preferences" :

How to Stream screen mirror Smartphone Android iOs iphone ipad PC MAC


How to Stream screen mirror Smartphone Android iOs iphone ipad PC MAC

 - Set as desired and then go to "Connection" and set "AirPlay Resolution" then hit apply :

How to Stream screen mirror Smartphone Android iOs iphone ipad PC MAC

 - Enable AirPlay on your smartphone :

How to Stream screen mirror Smartphone Android iOs iphone ipad PC MAC

 - Click ''AirPlay''
 - Select your computer and select the "video mirroring"
 - Finally, an iPhone appears on your computer,
 - You can then change the appearance by right-clicking on your smartphone.

 Have fun :)

How to Extend WhatsApp License for FREE


 As we Know that over 20 million people registered on whats app and the growth is increasing day by day with the passage of time.WhatsApp is one of the most popular messenger in the world because of its key features and reliability. But the main problem is that how to get whats app premium for free after 1 year expiry. So here is a very simple trick for you to get free whats app for 10 years.


How to Extend WhatsApp License lifetime 10 Years FREE

What you need :
 - Iphone / Ipad 
 - Your own Android phone

How to extend your whatsapp after it expires:

 1. Uninstall WhatsApp from your device. Don’t forget to backup your chat.

 2. Register your Android WhatsApp phone number on WhatsApp for iPhone (doesn't need to change the sim card, just register the number only).

 3. Enter 3 digit SMS code sent to your sim card and enter it on WhatsApp for iPhone.

 4. Re-install whatsapp on your Android, then register your number that already registered in iPhone and you will get 10 years license!

 Read also: Get paid Android applications for Free, Legally !

 Now enjoy your WhatsApp for free and share the post with your friends if you like it ! :)

Top Applications for Making Money on Your Smartphone


 Time is money. Did you know that your smartphone can make you earn money? Every minute spent playing or surfing aimlessly through the menus of your Android or iPhone can be used to fill your piggy bank, slowly but surely!
 Here are 5 top applications to easily make money (paypal) or gifts (Amazon gifts, iTunes Cards, Google Play, Xbox...) from home using your tablet or smartphone, the ones that really relate!
Top Applications for Making Money on Your Smartphone android iphone


 1/ Slidejoy is an app that adds a lock screen on your Android phone. When you go to unlock your phone you can either swipe left or right. Swiping right unlocks your phone normally and swiping left checks out the advertisement. Which way you swipe does not affect how much you earn! It's my favorite app for passive income!
 Minimum cashout: $2, You can cash out your money on PayPal at 1st day of every month.

 For US users: Sign-up for Slidejoy here, choose Cash mode then use choose Facebook or Email to sign-up.
 For NON US users: Sign-up for an account HERE, download the Apk file from HERE then sign-in using your account informations.
Make money with your android_iphone - Slidejoy


 2/ Cashpirate is an application for Android users only. It pays you to test free apps. There are nearly 50,000 registered members on CashPirate. You must select an application to be tested (PiratePicks section has the best offers), once downloaded you do not even need to launch the application which is simple and quick ! You can also respond to the survey or play videos to earn even more money.

 BONUS: Put the invitation code BZLONE at registration and earn 500 points instantly ($ 0.5)
 Refer your friends and earn more:
 - Level 1: 10 % of the earnings of your referrals
 - Level 2: 5 % of earnings referrals of your referrals


 3/ Fronto is an app that adds a lock screen on your Android phone. When you go to unlock your phone you can either swipe left or right. Swiping right unlocks your phone normally and swiping left checks out the advertisement. The number of points received per swip depends on the kind of action taken (i.e. reading an article, downloading an app, following a sponsor on social media, unlocking your phone) and is determined by their algorithm. You can also earn points by checking out the "Earn More" tab in the app where you can download apps to check out for points. 2,500 points = $1.
 Invit your friends using your referral link and earn more points instantly. (13 referrals = 5$ !)

 For US users: get it from Fronto Link
 For NON US users:
- Install SuperVPN, select USA and ''set location'' then clic ''connect''
- Download fronto app: Fronto.apk (last version 1.3.8)
- Subscribe then go to: ''settings'' > ''Have a promo code?'' > enter the code: 112233 to earn 1250 points instantly!
Make money with your android_iphone - Fronto


 4/ Appnana is an Android & iOs application that offers you money through Paypal, amazon & itunes cards just by watching videos and testing free applications. Several offerwalls were added (SponsorPay, radium, etc...)

 Use invitation code to earn 2500 nanas: d4018641 instantly

 Android: Download Appnana from Google Play.
 iOs: Simply open your Safari browser on your iPhone, iPad or iPod Touch and visit: appnana.com
Make money with your android_iphone - Appnana


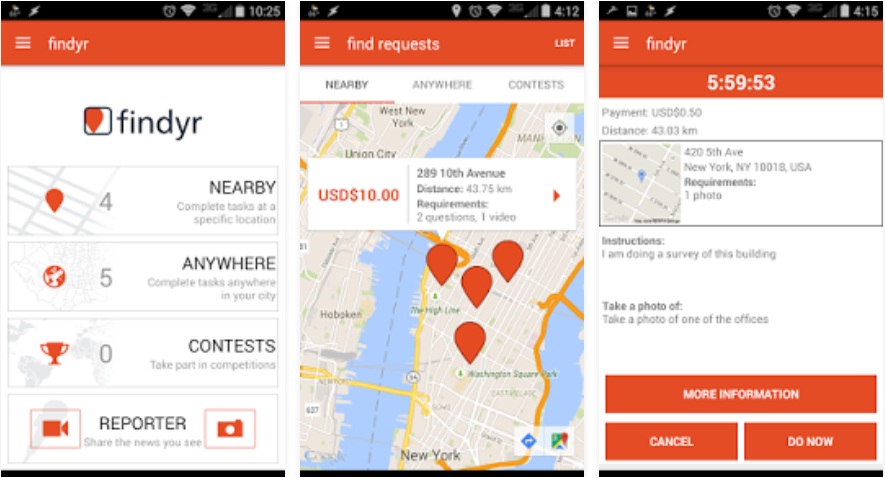
 5/ Findyr is a New York based company that is revolutionizing the way people use their smartphones to earn money. By downloading the Findyr app on Android or iDevice users can earn money by answering surveys, taking photos or capturing videos. It's a form of citizen journalism! More details and tips on their official blog.

 - Android: Download from Google Play
 - iOs: Get it from the App Store
Make money with your android_iphone - Findyr


 I only shared apps i tested, If you know have other trusted ones please let us know on comments below :)

How to Enable Multitasking in iOS 9


 Apple has released a major update to its iPhone and iPad platforms, iOS 9. More than simply a few aesthetic changes and neat little additions, iOS 9 enables multitasking features for those with hardware Apple deems capable.

 
How to Enable Multitasking in iOS 9

 Multitasking in iOS 9: Slide Over:

 Want to quickly send a message, jot down a thought or check where you need to go in Maps? Slide Over is here to help.
 Slide Over glides over the right edge of your app, fading whatever you’re doing into the background. It only works with compatible iOS 9 apps, so if your favourite app hasn’t updated for iOS 9, it won’t work.
 Once you’re done with your Slide Over task – writing a tweet, jotting down a thought or replying to a message – the sidebar simply slides away and you can get back to doing whatever you want with your iPad. Thankfully, it’s also incredibly easy to enable.
 - In whatever app you have open, slide your finger across from the right edge of the screen.

How to enable multitasking in iOS 9

 - Once slide over has come in, you can then pick from a selection of Slide Over-enabled apps installed on your iPad.
 - Tap the app you want to open and voilà, you’ve just activated your first Slide Over.

How to Enable Multitasking in iOS 9

 - If you want to change apps shown in Slide Over, just tap the top and the list of compatible apps will appear once more.

 Multitasking in iOS 9: Split View:

 Split View is another incredibly handy feature for the multitasking-obsessed iPad owner. However, unlike Slide Over, Split View only works on the iPad Air 2 and iPad Pro. If that’s you, here’s how you can enable Split View on your iPad.
 - Slide your finger in from the right-hand side of the screen, as you would for a Slide Over view.
 - Keep moving to the left, until the screen “Splits”, at which point you can take your finger off the screen.

How to Enable Multitasking in iOS 9

 - Now you can adjust the screen split between both apps and use them independently of one another.
 - If you want to change the apps shown in Split View, just tap the top and the list of compatible apps will appear once more.

How to Enable Multitasking in iOS 9

 Multitasking in iOS 9: Picture in Picture:

 Want to do some work, but don’t want to miss out on the football or what’s happening in the news? Apple has you covered with its “Picture in Picture” mode. Enabling Picture in Picture is pretty simple, here’s how.
 Note that it doesn’t seem to work with apps such as Netflix or YouTube – but it will work in web browsers.
 - Open a video in either iTunes, FaceTime, the Videos app or Safari.

How to Enable Multitasking in iOS 9

 - When you have a compatible video, press the little icon second from the right on the player’s controls and it will pop out and into the corner of your screen.
 - Here you can play, pause and skip through the video, all while being able to locate it wherever you want on your iPad screen.

How to Enable Multitasking in iOS 9

 Multitasking in iOS 9: QuickType:

 Fed up of having to faff around in documents to select, copy and paste text? Well, QuickType has just made your life much easier.

 At the top of your keyboard, you may have now noticed an all-new “Shortcut Bar”. This allows you to quickly copy, cut and paste text. Selecting text is easier now too: just place two fingers onto the keyboard to turn it into a big mouse for selecting text.

How to Enable Multitasking in iOS 9

 Apple says third parties have access to QuickType’s shortcut bar too, so you can expect to see some interesting features added to it over time.

 Share & comment the post if you like it :)

How to use your tablet as a computer screen monitor


 If you have a tablet that you no longer use (or in use), before sell or give, try this trick: use it as a monitor for your computer! This tutorial also works for smartphones, but the size of the tablets makes this more practical, you can always try if you own a phablet.

How to use your tablet as a computer screen monitor

 The way we will proceed to pass this tutorial is very simple, you only need to install a software on your computer and an application on your tablet. Each step will be described for you to succeed without worries. The software for your computer is Splashtop Streamer, available for Windows, Mac and Linux and the Extended Splashtop HD application is available for Android, iOS and Windows Phone.

Prerequisites:
 - Having a tablet (or smartphone) Android, iOS or Windows Phone.
 - A computer running Windows, Mac OS or Linux.
 - Having these two devices connected on the same network.

 How to use your tablet as a second monitor for your computer:

 - Download Splashtop Streamer.
 - Install like any software, create a Splashtop account.

How to use your tablet as a computer screen monitor splashtop streamer

 - Install Splashtop Extended Display HD application on the Android device, if you have an iDevice use this free iOs version.
 - To connect the two devices, create an access code, for this, return to the software in the Security tab:

How to use your tablet as a computer screen monitor splashtop streamer

 - Return to the application on your Android or iDevice, enter the code created above.
 - The computer and the tablet are now connected.
 - Configure the display, press on your tablet using 3 fingers, the Display Setup window should appear on the computer.
 - Moving the second screen to the right or left of the first according to the tablet position.

 Once connected, you can use your tablet to just keep an eye on one of your softwares or use the tablet itself to write text for example. The practical side of a tablet as a screen instead of a real monitor is the touch-screen (faster and more convenient).
 The disadvantage of this solution is that it's only a trial (5 minutes continous connection), so do not hesitate to buy the full version if you need.

 Like & share the trick :)

How to save Smartphone if dropped in water !


 "PLOUF! "Yes, that sound can trigger an impressive state of panic. A smartphone that falls into the water can turn into a big loss. Do not laugh! It could happen to anyone: a puddle of water that flows in your pocket, pool falls, fast toilet... When our smartphone takes water, at the time, it's always a little hysteria, we try a bit of everything and anything in haste, hoping to save his poor drowned smartphone.


How to save smart phone if dropped in water

 By following these steps, you should be able to save its life. However, the method only works for devices that offer easy access to the battery and circuits, so with a removable back cover!
 Here's how:
 - Immediately remove the device from the water! Yes it seems logical but some users in panic, tend to do a little anything and do not necessarily have this first instinct.
 - Remove the battery as soon as possible to avoid blowing up. Do the same with the SIM card and SD card.
 - Mop up with your emergency kit (with towels and cotton swabs for smaller corners).
 - Put your smartphone in a food sachet with rice! You can also add sachets of Silica Gel. Remember to expel air from the sachet. Rice and Silica Gel will absorb any moisture.
 - Wait 48 to 72 hours before reopening the sachet. The longer you wait the better will be. Open the sachet and check if everything is dry. Restart the phone to check that it works well.

How to save your smart phone if dropped in water

 This method has proven successful but does not ensure saving 100% of smartphones. It works for water. Do not try to do the same thing if it fell into milk for example or any alcoholic or soft drink.
 Finally be aware that even if the smartphone seems to work well, it will inevitably leave traces of oxidation in the device. Its life will be much shorter than if it were ever happened to it. And above all, be careful not to repeat the accident.

 New lives saved?? Share your experience in comments below! :D

How to fix a TaiG iOS 8.3 Jailbreak stuck at 20%


 If you are among those who have problems with the Taïg 2.0 jailbreak tool for iOS 8.3 stuck at 20%. Know that the problem was corrected. However, if this persists, a solution is offered to you!


how to jailbreak ios 8.3 iphone stuck error

 Remember:
 The Team precise that CydiaSubstrate is not yet compatible with iOS 8.2 and 8.3, so it is better to wait to jailbreak your device.

  You have to go on the old version of iTunes 12.1.0, and you should pass the milestone of 20% during the jailbreak process. We remind you that the Mac version of Taïg 2.0 is not available. So you have to do it in Windows.

 - Remove completely the current version of iTunes on your PC. How? See full steps on Apple Suppot Page.

 - Reboot, then download and install iTunes 12.0.1 (DO NOT update it when prompted)

 - Retry the Taig 2.0 Jailbreak for iOs 8.3

how to jailbreak ios 8.3 iphone stuck error

 Feel free to tell us in the comments if this solution will help you!
 Enjoy :)