Unordered List

Play PES 2015 Online with your friends

Play PES2015 online and challenge your friends on PS4

Start your blog easily in few clicks

Create a professional blog without any experience and start making money

Get paid iPhone apps for free, Legally!

App trackers allow you to legally track changes in price for many, if not most, apps available on the iTunes App Store

Install Kali Linux in dual boot with Windows

Learn how to have Kali Linux installed in dual boot with your Windows and take profit of the distibution functionalities

Youtube: FIVE Tips and tricks for the fatest use

If you think you know everything about YouTube, Check out these Fast Five tricks...

Showing posts with label android. Show all posts

How to Take Screenshot on Android


 It may seem tricky to take screenshots on an Android mobile, but it isn't! Upon taking a screenshot the following message will be displayed "Saving screenshot...". You can view your screenshots by going to Gallery" > "Screenshots.


Take Screenshot / Screencapture on Android

 Method 1: (All Android devices)

 Simultaneously press on the Home and Power button:
Take Screenshot / Screencapture on all Android devices

 You'll hear the camera shutter sound that indicates that the screenshot has been saved.

 Method 2: (Samsung Galaxy S5)

 Go to Settings > Motions and gestures > Capture screen.
 By enabling the Capture screen feature, you can take screenshots by swiping the side of your hand over the screen (from left to right or vice versa).
Take Screenshot / Screencapture on Android

 The screenshots are automatically saved in Gallery > Album > Screenshots.

 Method 3: (Samsung Note)

Press the button of the S-Pen stylus. A small circular menu (Air Command) will be displayed on your screen. Tap on Screen Write to take a screenshot of your current screen.

Take Screenshot / Screencapture on Android

 For Nexus, press simultaneously On/Off and volume button.
Take Screenshot / Screencapture on Android

 Have fun :)

Block Unwanted Calls on Android (NO ROOT)


 Block unwanted calls If you don't want to be bothered by phone calls when you are at work meeting, or just from a particular contacts and private numbers. Below are some simple tips that can help you avoid them with diffrent options.


how_to_block_unwanted_private_calls_android (NO ROOT)


 Reject a call with a message :

 You can easily reject an incoming call with a text message. Simply drag the small tab displayed below the call screen, choose a message and tap on Send to cancel the incoming call.
 You can have up to six different call rejection messages. To create a custom one, go to Settings > Device > Call > Set Call Rejection Messages and tap on the + button displayed next to Create new message.

 Create a call reject list :

You can create a call reject list to block unknown numbers or unwanted contacts. Calls made from numbers added to the reject list are automatically forwarded to your voice mail. Open the Contacts app and then tap on the Menu > Settings. Go to Call > Call rejection > Auto reject list. Tap on Create to create your call reject list.


 Add a number to the reject list :

 Tap on the Contacts icon and select the number from your contact list or call log. Alternatively you can use the Enter number field to add a specific phone number.

 Automatically block numbers matching specific criteria :

 You can also create a filter to block calls from phone numbers that match a certain criteria (specific region code, prefix...). Tap on Match Criteria and select a filter: Exactly the same as, Starts with, Ends with or Includes.
 Tap on Save to apply your new settings.

 Remove a contact from the reject list :

 If you changed your mind and want to allow calls from a blocked contact, then simply edit its corresponding entry in the reject list. Open the reject list and clear the checkbox appearing next to the contact your want to unblock to allow call and messages from the latter. If you want to permanently remove the selected contact from the reject list, then simply tap on the Trash icon displayed at the top right corner of your screen.

 Read: Why & How to Root your android phone easily

 How to Block Calls from Private Numbers:

 There's nothing more annoying than being harassed by calls or messages from private (hidden) numbers. But who are these people, how did they get your phone number and most importantly how can you prevent them from calling you again. This tutorial explains how to block calls or SMS from a private numbers on Android.

 Most of the front-end touch interface (HTC Sense, LG Optimus UI or Samsung TouchWiz) have a built-in feature to block incoming calls and messages from hidden number. The procedure may vary depending from one manufacturer to another, but in general you should be able to access this setting from the Phone app. Here's the procedure for the Samsung Galaxy S6:

 Open the Phone app, tap on the More button and go to: Call Settings > Call Rejection > Auto reject list then toggle the Unknown option On:
 
how_to_block_unwanted_private_calls_android (NO ROOT)

 Note: If your Android smartphone possess any option to block unknown numbers, simply download and install call blocking app such as Extreme Call Blocker or SMS and Call Blocker.

 Say goodbye to annoying people calls!:D
 Do you have any questions or suggestions? Let us know on comments below

How To Backup and Restore SMS, CONTACT, PHOTOS, APPLICATIONS on Android


 Losing your Android device, breaking it or being stolen are unexpected things that can quickly arrive! If these incidents are always embarrassing, it is nevertheless possible to cushion the confusion by saving the contents of your smartphone or tablet! To do this, several solutions available to you. This post presents the simplest.


How To Backup and Restore SMS, CONTACT, PHOTOS, APPLICATIONS on Android

 Just like on the computer, make a backup of your data is an easy way to keep them if you have to change your Android device. This is simply about to save these data to an external storage medium, in the ocurrence an SD card.
 If Android does not initially saves data, many applications dedicated to this function are available on Google Play.
 Among the most reliable, we note Super Backup SMS & Contacts, Helium, Titanium Backup, My Backup Pro or Ultimate Backup Pro.

  1 - Super BackUp:

 Regularly updated, Super BackUp is among the fastest and most intuitive Backup apps. It will allow you to keep your text messages, your contact list, your call history, calendar and bookmarks. The application also allows you to save your application data, provided that your device is ROOTED.

  Read: Why & How to Root your android phone easily

  Still can't root? Check this post: Root any Android device manually like a Pro !

 - Download, install the application and start it:
 Google Play Link
How To Backup and Restore SMS, CONTACT, PHOTOS, APPLICATIONS on Android

 - Select the type of data you want to save from the menu:

How To Backup and Restore SMS, CONTACT, PHOTOS, APPLICATIONS on Android

 - Now hit ''Backup''
How To Backup and Restore SMS, CONTACT, PHOTOS, APPLICATIONS on Android

 - Validate the name of the default backup file, or choose another one.
By default, data is saved to the internal memory of your phone. Therefore, it's necessary to change the destination directory to the SD Card!
How To Backup and Restore SMS, CONTACT, PHOTOS, APPLICATIONS on Android

 - For more security, you can send your data to your mailbox by selecting "Send To Email". When you want to restore your data, simply choose again the data type and then select "Restore" and designate the backup to restore.

 Super Backup can serve you in case you change your device. You will now simply install the application again to access your Backups stored on the SD card. This feature is also useful when you change ROM or if you ever want to reset your device to factory settings.

 If your device is Rooted, the process will be the same to save your apps and their data.

 2 – Google Sync:

How To Backup and Restore SMS, CONTACT, PHOTOS, APPLICATIONS on Android
 Google allows you to save your data directly to your Google account from a device to another.

 For that, nothing simpler. Go to ''Settings'' on your device, select the "Accounts" tab, choose your Google Account, then select the data you want to backup.

 However, this feature does not allow you to save your SMS, and photos.

 3 - Save your photos and videos on the cloud, Dropbox or Google +

 One of the simplest ways to keep your photos and videos and store them on internet. To do this you simply put them online on social networks like Instagram or Google +, which offer unlimited storage space. In addition, Google + retains the original quality and size of your photos.

How To Backup and Restore SMS, CONTACT, PHOTOS, APPLICATIONS on Android

 The fastest is Dropbox, just download it from Google Play, choose the setting: automatically upload photos / videos taken by the camera of your Android device. However, Dropbox is limited by default to 5GB.

 Read on our Blog: How to use OneDrive


 4 - Manual BackUp:

 The latter might seem obvious, but remember that it is useful to manually transfer important data on different devices: by connecting to the PC via USB, or by inserting your MicroSD into your PC to drag and drop files of your choice.
 A manual backup per month would be a good compromise that will just cost you a few minutes and you will avoid tearing your hair in case of loss or break.

 And you, what solution do you use? Share your opinion in comments below :)

How to Stream your Smartphone Screen (Android / iOs) on Your PC / MAC


 You want to display the content of your iPhone / iPad or even your Android screen (streaming or mirroring) on your computer? Here is a short simple tutorial to help you then you can play your favorite games or navigate through your computer's big screen!

 
How to Stream screen mirror Smartphone Android iOs iphone ipad PC MAC

 Prerequisite:
 We must first download and install Reflector 2 software on your PC / Mac and your mobile device.

 The Reflector 2 is available for PC, Mac, Android and iDevice from the official site: http://www.airsquirrels.com/reflector/download/

 Read also: How to use your tablet as a computer screen monitor

 Show screen contents on your computer (Mac or PC) :

 After installing the software on your computer and the application on your mobile device, just follow these steps:

 - Launch Reflector 2 on your computer
 - Select the "Try Reflector 2" option,
 - Go down & right and make a right click on the Reflector 2 icon
 - Once a small window appears, go to "Settings"
 - Choose "Preferences" :

How to Stream screen mirror Smartphone Android iOs iphone ipad PC MAC


How to Stream screen mirror Smartphone Android iOs iphone ipad PC MAC

 - Set as desired and then go to "Connection" and set "AirPlay Resolution" then hit apply :

How to Stream screen mirror Smartphone Android iOs iphone ipad PC MAC

 - Enable AirPlay on your smartphone :

How to Stream screen mirror Smartphone Android iOs iphone ipad PC MAC

 - Click ''AirPlay''
 - Select your computer and select the "video mirroring"
 - Finally, an iPhone appears on your computer,
 - You can then change the appearance by right-clicking on your smartphone.

 Have fun :)

How to Extend WhatsApp License for FREE


 As we Know that over 20 million people registered on whats app and the growth is increasing day by day with the passage of time.WhatsApp is one of the most popular messenger in the world because of its key features and reliability. But the main problem is that how to get whats app premium for free after 1 year expiry. So here is a very simple trick for you to get free whats app for 10 years.


How to Extend WhatsApp License lifetime 10 Years FREE

What you need :
 - Iphone / Ipad 
 - Your own Android phone

How to extend your whatsapp after it expires:

 1. Uninstall WhatsApp from your device. Don’t forget to backup your chat.

 2. Register your Android WhatsApp phone number on WhatsApp for iPhone (doesn't need to change the sim card, just register the number only).

 3. Enter 3 digit SMS code sent to your sim card and enter it on WhatsApp for iPhone.

 4. Re-install whatsapp on your Android, then register your number that already registered in iPhone and you will get 10 years license!

 Read also: Get paid Android applications for Free, Legally !

 Now enjoy your WhatsApp for free and share the post with your friends if you like it ! :)

Top Applications for Making Money on Your Smartphone


 Time is money. Did you know that your smartphone can make you earn money? Every minute spent playing or surfing aimlessly through the menus of your Android or iPhone can be used to fill your piggy bank, slowly but surely!
 Here are 5 top applications to easily make money (paypal) or gifts (Amazon gifts, iTunes Cards, Google Play, Xbox...) from home using your tablet or smartphone, the ones that really relate!
Top Applications for Making Money on Your Smartphone android iphone


 1/ Slidejoy is an app that adds a lock screen on your Android phone. When you go to unlock your phone you can either swipe left or right. Swiping right unlocks your phone normally and swiping left checks out the advertisement. Which way you swipe does not affect how much you earn! It's my favorite app for passive income!
 Minimum cashout: $2, You can cash out your money on PayPal at 1st day of every month.

 For US users: Sign-up for Slidejoy here, choose Cash mode then use choose Facebook or Email to sign-up.
 For NON US users: Sign-up for an account HERE, download the Apk file from HERE then sign-in using your account informations.
Make money with your android_iphone - Slidejoy


 2/ Cashpirate is an application for Android users only. It pays you to test free apps. There are nearly 50,000 registered members on CashPirate. You must select an application to be tested (PiratePicks section has the best offers), once downloaded you do not even need to launch the application which is simple and quick ! You can also respond to the survey or play videos to earn even more money.

 BONUS: Put the invitation code BZLONE at registration and earn 500 points instantly ($ 0.5)
 Refer your friends and earn more:
 - Level 1: 10 % of the earnings of your referrals
 - Level 2: 5 % of earnings referrals of your referrals


 3/ Fronto is an app that adds a lock screen on your Android phone. When you go to unlock your phone you can either swipe left or right. Swiping right unlocks your phone normally and swiping left checks out the advertisement. The number of points received per swip depends on the kind of action taken (i.e. reading an article, downloading an app, following a sponsor on social media, unlocking your phone) and is determined by their algorithm. You can also earn points by checking out the "Earn More" tab in the app where you can download apps to check out for points. 2,500 points = $1.
 Invit your friends using your referral link and earn more points instantly. (13 referrals = 5$ !)

 For US users: get it from Fronto Link
 For NON US users:
- Install SuperVPN, select USA and ''set location'' then clic ''connect''
- Download fronto app: Fronto.apk (last version 1.3.8)
- Subscribe then go to: ''settings'' > ''Have a promo code?'' > enter the code: 112233 to earn 1250 points instantly!
Make money with your android_iphone - Fronto


 4/ Appnana is an Android & iOs application that offers you money through Paypal, amazon & itunes cards just by watching videos and testing free applications. Several offerwalls were added (SponsorPay, radium, etc...)

 Use invitation code to earn 2500 nanas: d4018641 instantly

 Android: Download Appnana from Google Play.
 iOs: Simply open your Safari browser on your iPhone, iPad or iPod Touch and visit: appnana.com
Make money with your android_iphone - Appnana


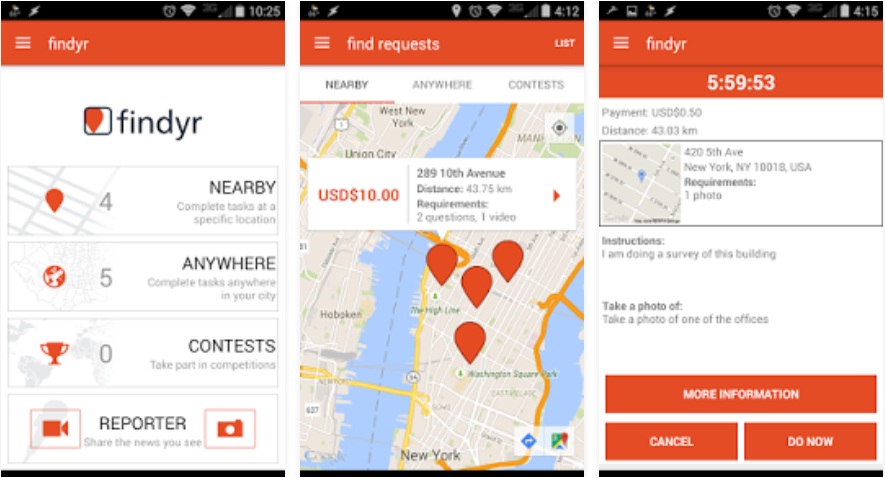
 5/ Findyr is a New York based company that is revolutionizing the way people use their smartphones to earn money. By downloading the Findyr app on Android or iDevice users can earn money by answering surveys, taking photos or capturing videos. It's a form of citizen journalism! More details and tips on their official blog.

 - Android: Download from Google Play
 - iOs: Get it from the App Store
Make money with your android_iphone - Findyr


 I only shared apps i tested, If you know have other trusted ones please let us know on comments below :)

How To Fix Battery Issues On Android


 Battery problems are among the biggest concerns for smartphone users, which is why we offer many useful tips and tricks for solving battery drain issues. If you notice that your battery performance and duration has decreased, it could be time to consider calibrating your battery. Keep in mind that there are plenty of other things that can cause a battery to malfunction. If your phone doesn't charge for exemple, there might be a problem with the port; if you've just updated the firmware on your phone, battery drain is a common complaint, so you might want to clear the cache partition on your phone etc.

how_to_fix_battery_drain_issue_android

 I - How to calibrate the battery on your Android phone:

 The Android operating system has a feature called Battery Stats, which keeps track of battery capacity, when it is full or empty. The problem is that it sometimes it become corrupted and starts displaying data that isn’t real, which, for example, causes the phone to turn off before reaching 0 percent. Calibrating your Android battery simply means getting the Android OS to correct this information so it is reflective of your actual battery levels once again.

How to calibrate Android device battery without root access:

1. Discharge your phone fully until it turns itself off.
2. Turn it on again and let it turn off.
3. Plug your phone into a charger and, without turning it on, let it charge until the on-screen or LED indicator says 100 %.
4. Unplug your charger.
5. Turn your phone on. The battery indicator will likely not say 100 %, so plug it in (leave your phone on for this) and continue charging until it says 100 % on-screen as well.
6. Unplug your phone and restart it. If it doesn't say 100 % plug the charger back in until it says 100 % on screen.
7. Repeat this cycle until it says 100 % (or as close as you think it's going to get) when you start it up without being plugged in.
8. Now, let your battery discharge all the way down to 0 % and let your phone turn off again.
9. Fully charge the battery one more time without interruption and you should have reset the Android system's battery percentage.
Please remember that it is not recommended to perform this process all the time. Perform this process once every three months at the most.

How to calibrate Android device battery with root access:

1. Discharge your phone fully until it turns itself off.
2. Turn it on and let it discharge and turn off again.
3. Plug your phone into a charger and, without turning it on, let it charge until the on-screen or LED indicator says 100 %.
4. Unplug your charger.
5. Turn your phone on. The battery indicator will likely not say 100 percent, so plug it in (leave your phone on) and continue charging until it says 100 % on the screen as well.
6. Unplug your phone and restart it. If it doesn't say 100 %, plug the charger back in until it says 100 % on screen.
7. You want to repeat this cycle until it says 100 % (or as close as you think it's going to get) when you start it up without being plugged in .
8. Now, install the Battery Calibration app and, before launching it, make sure your battery is at 100 % again, then restart.
9. Immediately launch the app and recalibrate your battery.
10. Once you've calibrated your battery, discharge it all the way down to 0 % and let your phone turn off again.
11. Fully charge the battery one more time without interruption and you should have reset the Android system's battery percentage.

 II - How To Fix Battery Drain Issue On A Rooted Android Device:

 As you would already know, numerous factors contribute towards hogging and draining your limited battery resources, but on the positive side, there are certain effective methods that can help you with rectifying said issue, and get the maximum life out of your Android’s battery.

1. Power your device off and plug it in for charging until the LED indicator turns green (100%).
2. Reboot into recovery: Device powered off, hold down the (device-specific) key combination that brings up the bootloader and select Recovery.
3. Wipe Battery Stats: advanced > Wipe Battery Stats > Yes – Wipe Battery Stats.

fix_battery_drain_issue_android_recovery

4. Return to the main system recovery menu and reboot (reboot system now).
5. Once rebooted, unplug your device and let the battery discharge completely.

 Did the aforementioned guide help you overcome the problem? Do let us know about your personal experiences with your Android’s battery by posting in the comments section below :)


How to use your tablet as a computer screen monitor


 If you have a tablet that you no longer use (or in use), before sell or give, try this trick: use it as a monitor for your computer! This tutorial also works for smartphones, but the size of the tablets makes this more practical, you can always try if you own a phablet.

How to use your tablet as a computer screen monitor

 The way we will proceed to pass this tutorial is very simple, you only need to install a software on your computer and an application on your tablet. Each step will be described for you to succeed without worries. The software for your computer is Splashtop Streamer, available for Windows, Mac and Linux and the Extended Splashtop HD application is available for Android, iOS and Windows Phone.

Prerequisites:
 - Having a tablet (or smartphone) Android, iOS or Windows Phone.
 - A computer running Windows, Mac OS or Linux.
 - Having these two devices connected on the same network.

 How to use your tablet as a second monitor for your computer:

 - Download Splashtop Streamer.
 - Install like any software, create a Splashtop account.

How to use your tablet as a computer screen monitor splashtop streamer

 - Install Splashtop Extended Display HD application on the Android device, if you have an iDevice use this free iOs version.
 - To connect the two devices, create an access code, for this, return to the software in the Security tab:

How to use your tablet as a computer screen monitor splashtop streamer

 - Return to the application on your Android or iDevice, enter the code created above.
 - The computer and the tablet are now connected.
 - Configure the display, press on your tablet using 3 fingers, the Display Setup window should appear on the computer.
 - Moving the second screen to the right or left of the first according to the tablet position.

 Once connected, you can use your tablet to just keep an eye on one of your softwares or use the tablet itself to write text for example. The practical side of a tablet as a screen instead of a real monitor is the touch-screen (faster and more convenient).
 The disadvantage of this solution is that it's only a trial (5 minutes continous connection), so do not hesitate to buy the full version if you need.

 Like & share the trick :)

How to save Smartphone if dropped in water !


 "PLOUF! "Yes, that sound can trigger an impressive state of panic. A smartphone that falls into the water can turn into a big loss. Do not laugh! It could happen to anyone: a puddle of water that flows in your pocket, pool falls, fast toilet... When our smartphone takes water, at the time, it's always a little hysteria, we try a bit of everything and anything in haste, hoping to save his poor drowned smartphone.


How to save smart phone if dropped in water

 By following these steps, you should be able to save its life. However, the method only works for devices that offer easy access to the battery and circuits, so with a removable back cover!
 Here's how:
 - Immediately remove the device from the water! Yes it seems logical but some users in panic, tend to do a little anything and do not necessarily have this first instinct.
 - Remove the battery as soon as possible to avoid blowing up. Do the same with the SIM card and SD card.
 - Mop up with your emergency kit (with towels and cotton swabs for smaller corners).
 - Put your smartphone in a food sachet with rice! You can also add sachets of Silica Gel. Remember to expel air from the sachet. Rice and Silica Gel will absorb any moisture.
 - Wait 48 to 72 hours before reopening the sachet. The longer you wait the better will be. Open the sachet and check if everything is dry. Restart the phone to check that it works well.

How to save your smart phone if dropped in water

 This method has proven successful but does not ensure saving 100% of smartphones. It works for water. Do not try to do the same thing if it fell into milk for example or any alcoholic or soft drink.
 Finally be aware that even if the smartphone seems to work well, it will inevitably leave traces of oxidation in the device. Its life will be much shorter than if it were ever happened to it. And above all, be careful not to repeat the accident.

 New lives saved?? Share your experience in comments below! :D

Uninstall operators and manufacturers applications from an Android device


 The applications are a little bit the base of our smartphones; without them they would be useless, but they are not all useful. Everyone has their way of using their smartphone and most annoying is having unnecessary elements that still taking up space. Operators apps are the best example, you want to know how to remove them?

Uninstall Manufacturer System Application


 I will offer two radically different solutions below. The "soft" solution that is quick and easy to achieve, but that is not optimal. A "hard" solution is more complicated, but very effective. It will be up to you to choose the one you want to follow, the second allowing you to really remove your unwanted Android applications.

 How to uninstall operators and manufacturers applications?

 We'll start with the easiest solution to finish with the most complex, each step is explained and accompanied by image so that each of you can achieve easily. According to your phone, your experience may differ a little.

Disable your applications:

 This solution will not allow you to uninstall applications called "systems" as those of your operator, but will make them invisible, non-functional. By disabling an application, you will not see its notifications and the icon will no longer appear in your applications list. You can disable and re-enable your applications at any time.
 - Go to Settings on your Device
 - Then, in the Applications section (Application Manager)
 - Select the application you want to disable (or uninstall)
 - Press Disable
 - A warning message appears, click OK

Disable Android System Application

 Root your Android device:

 Rooting your device seems complicated and dangerous, but it's not quite that. First, the root allows you to have all of the administrators rights on your phone, this allows you to full control and even have more features. Moreover, rooting phone does not remove the warranty of your smartphone.

Learn more:

 How to uninstall applications on a Rooted Phone:

 Once you root your phone, you can uninstall any application, be it that you downloaded, those of your operator and even of your Android system that you do not need. You will be free to do what you like on your phone. I'll show you a sample application that allows you to do this.

 - Install System App Remover application (ROOT)
 - Launch it
 - Select the application (s) to uninstall
 - Press Uninstall
 - Validate the procedure by pressing YES

Uninstall Android System Application

 The application offers you two parts, User Applications and System Applications. The first part functions as the integrated application manager for Android and allows you to uninstall several more applications at once. The second part allows to get rid of your operator applications, your manufacturer and those integrated with Android.

 Be careful not to uninstall anything, some system applications should especially not be uninstalled.
 Luckily, System App Remover indicates each application's level of importance by messages like ''Should Keep'', orange for those you can uninstall and red for those that do not really need uninstall.


Uninstall Android System Application

How to restore my deleted applications when needed

 If necessary, uninstalled apps with this application (at least the system applications) are placed in a ''Recycle Bin''. If you have uninstalled an important application by mistake or you want to finally resume the application, you simply go to Recycle Bin and restore it. Here's how:
 - Press the up trash icon
 - Select the application (s) to be restored
 - Press Restore
 - Validate the procedure

restore deleted android system application


 Of course, many other applications on the Play Store are used to do the same things, I chose this application because i find it very powerful and practical, moreover, it is very light and free. If you prefer to choose another application, do not forget to check if it allows you to exploit the root of your phone. This is usually written (ROOT) in the application name or in the description.

 Share the tip if you like it :)

How to unlock/reset forgotten pattern Screen Lock on Android


 The pattern screen lock for mobile and Android tablets, which you are the only one who knows the seizure, secures the data on your device. If you have forgotten the Android unlock pattern, the only solution is, according to mobile phones, to answer the secret question or give the Google password or change the password via Android Manager or Find my Samsung mobile if it is synchronized with your Google account or Samsung. But a problem arises when the mobile internet connection is disconnected...


 The only solution is to reset the phone, which will effectively delete all information stored on the phone.
 You can:
 - Directly reset your Android,
 - Or access the Recovery mode of the device, navifate with volume buttons:
 > to launch a Factory Reset / Wipe data,
 > and confirm using Home or Power Button depending on the phone.
 Warning: You lose all data on the phone (not on the SIM card or SD card): Apps, Contacts (unless you are synchronizing with Google), and memory data.
 The reset method varies according to mobile models. Refer to your smartphone's user guide for instructions on performing a Hard Reset.

 Reset according phones:

 LG Optimus L: Turn off your phone, then hold 3 keys simultaneously for 10 seconds: Volume Down + Home + Power. The phone will vibrate and light up, you can release the keys. The phone will reset.
 LG G3: http://solverbase.com/w/LG_G3:_Hard_Reset_(Factory_Reset)
 LG Nexus 4: Vol Down + Power
 Samsung Galaxy S: Vol Up + Home + Power
 Samsung Galaxy S2: Vol Up + Power
 Samsung Galaxy S3: Vol Up + Home + Power
 Samsung Galaxy S4 / S4 Mini: Vol Up + Home + Power simultaneously, then release "power" when vibrating and maintaining the other two until the appearance of "Recovery" on the screen.
 Samsung Galaxy S5 / S5 Mini: Vol Up + Home + Power simultaneously, then release "power" when vibrating and maintaining the other two until the appearance of "Recovery" on the screen.
 Samsung Galaxy S6 / S6 Edge: Vol Up + Home + Power simultaneously, then release "power" when vibrating and maintaining the other two until the appearance of "Recovery" on the screen.
 OnePlus One: Vol Down + Power
 Wiko Cink Slim: Vol Down + Vol Up + Power
 Wiko Cink Peax: Vol Down + Vol Up + Power

How to connect Android Wear with an iPhone / iPad


 Developers have been quick to offer different methods to connect an iDevice (iPhone or iPad) with Android Wear (Watch). The lastest method does not require to have a jailbroken device and is fairly simple to implement!
 Note: Obviously this is far from being a 100% functional functional. It works, however it will have to wait a bit for a more stable method, or an official method.. maybe!

connect android wear watch with iphone
 
 - Turn on Bluetooth on all three terminals (iPhone, Android phone and Android Watch)
 - Install the applications:
 Wear Connect on your Android devices.
 BLE Utility on your iPhone.

 - Make sure that the Android phone is connected to your Android Wear terminal, synchronized and updated on the latest version.
 - Once everything is installed, open Wear Connect application on your Android phone, then on your Android Wear.
 - Activate the "iOS Service" on your Android Watch:

connect android wear watch with iphone

 - Now open BLE utility application on your iOs terminal.

connect android wear watch with iphone

 - In "Peripheral", you will be able to detect your Android Wear with Bluetooth Low Energy. Once detected, the connection is set up and notifications arrive on the Watch!

connect android wear watch with iphone
 
Enjoy :)

How To Easily: decompile, translate, compile and sign an Android application


 This post is about to show you the method to use to translate an Android app easily and without any experience in programmation.


decompile translate compile sign android application

 Of course, your mobile must be Rooted (See how to do it easily using one click methods or advanced manually method)
 You must have a Java machine installed on your computer (JRE).

 To decompile and compile the apk we will need Apktool, download and install it.
 Download the archive that matches your system then unzip all in one folder.

 To sign the compiled application we will use Sign +. Download and install it.

 Framework:

 - On your mobile, get the file from your phone (using Es Explorer app for exemple):
framework-res.apk
From:
/system/framework
 - Copy it to the apktool folder.
 - By using a command line into the apktool folder, install the framework with this command:
apktool if framework-res.apk

 Decompilation:

 - Copy and past the app you want to translate into the apktool folder (eg. mms.apk)
 - In the command line type:
 apktool decode mms.apk
 - Now apktool show the following:
I: Baksmaling...
testI: Loading resource table...
I: Loaded.
I: Loading resource table from file: C:\Users\Fred\apktool\framework\1.apk
I: Loaded.
I: Decoding file-resources...
I: Decoding values*/* XMLs...
I: Done.
I: Copying assets and libs...
 - A file was created with the name of the app, it contains the decompiled code.

 Translation:

 - For the translation, we'll need an xml editor (eg. Notepad).
 - In mms / res we can found the folder:
 Values
 - And as many folders as languages installed eg for English:
Values-en
 - In each folder there is xml files with translations. To translate an app, create a folder:
Values-en
 - And copy all the xml files with translatable strings.
 - We translate only the text between the tags without affecting the rest, for example (the text in bold):
<string name="app_label">Messages</string>
<string name="new_message">New message</string>

 Compilation / Signature:

 - Once the translations are done, you have to recompile the application.
apktool build mms mms2.apk
 mms: folder name
 mms2.apk name of the created apk

Signature:
 - Run sign+ in administrator mode
 - Browse, select the new apk then "sign files"

Installation in the phone:
 - Copy the created app:
mms2.apk
 - Past it in:
/system/apk
 - Change permissions: rw-r-r (using Es Explorer).
 How to change permissions?
 Long press mms2.apk, scroll down and select properties from the list. A window will pop up then change it like this:
 User: check read, write and execute
 Group: check read and execute
 Other: check read and execute
 - Restart the launcheur.
 Done :)

How to increase RAM on your Android device without SD card partitioning


 Here is a simple tutorial to increase RAM memory up to 4GB using a swap file on your SD card (so no need to partition with risk of degrade SD card life)

 What is RAM?
 More RAM means a more efficient (and faster) device.
 (RAM) Random Access Memory is temporary data storage that the CPU uses during calculations. The more RAM a device has, the more calculated results the CPU can store, which means less time the CPU has to do the same thing over and over again. In other words, the CPU can check RAM to see if it has already made a particular calculation in the recent past. If it has, it can use the pre-computed results instead of wasting processing time recomputing the same calculation.


 Increase the RAM memory virtually using your SD CARD without partitioning or farmating is possible using a paid application that i highly recommend you to pay for it because it's really very useful and to support developper for his huge work.
 It is accompanied by a first FREE app to test memory and compatibility before you buy (recommended)

 Requirements:
 - Android 1.6 or higher
 - Root (Refer to our guide on how to root Android devices using One Click method or Manually)
 - A micro SD card class 10 minimum (more performance better results)

 NOTE: You can use a lower class, but you can not add a lot of ram if you want optimal operation.

1st Step (optional but highly recommended):


 Allows to analyze the ability of SWAP + Device compatibility:
 - Download & install MemoryInfo & Swapfile Check from Google Play


 - Click on "ROEHSOFT RAMEXPANDER TEST"

 - Select your External SD CARD (second position generally)


 -  At the end of the test (sometimes you have to press "Cancel Test",but wait until 5 minutes), the application indicates that the test was successful and how much RAM you can have (the maximum possible, and not the optimum value).

 - You can access the SWAP app on Play Store directly from this window by pressing ''Get it on Market now'':


 2nd Step

 - Download & install ROEHSOFT RamExpander (SWAP) from Google Play (paid). If you'll not use Google Play to get it be careful on what you'll download.


 - Now navigate to the application menu to manage the settings of your SWAP file

 - I highly recommend you to press OPTIMAL VALUES. Indeed, for those who have made the first step, the SWAP application will use the information gathered by the TEST application to optimize your SWAP file (Depending on your SD card, and the capabilities of your phone)


 - Now parameterize your personal settings (Autorun and Notify Icon for example).
 NOTE: Although Autorun is checked, in any case, after a reboot you need to open the application and activate the swap.

 - Once you are ready, proceed to the moment of truth: Check "SWAP ACTIVE" on the top left.
 - Select your External SD CARD

 - Now be patient... The first time the application creates the SWAP file (swap.swp)

 IMPORTANT: Even if it is possible, do not leave or change application during the process, it will simply result functional SWAP but unfinished, so smaller.

 - After the creation is complete, the application informs you the size of the swap created and the write speed of the SD card (13 being the recommended minimum speed)

 - Enjoy faster Android device! :


 Post-Use:
 - After activation, the phone may be slow for a few 5 seconds

 - If updating the OS or application, it is possible that the swap does not work (you'll need to re-create it while it already exists with the same name). In this case, use a file manager (like ES Explorer) and delete the swap file (which has the same name, at the root of the SD card)
 I repeat: after a reboot, must often activate the swap by clicking Swap Active.

 - The total RAM does not appear in the multitasking menu MIUI, but it is available!

Here we're! I hope you enjoyed the post! Share it with your friends and don't miss to let your comment for any questions or feed-back :)